
Master Class in MyCAREER Dominance: How to Master Shot Timing, Green Windows, and Defensive Ankle-Breaks in NBA 2K27
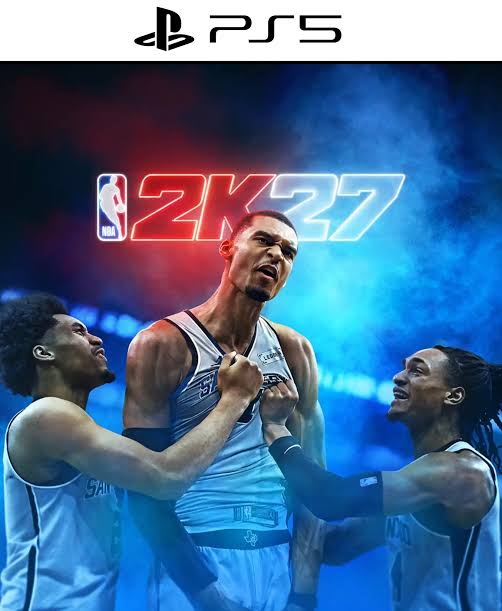
NBA 2K27 elevates the virtual basketball simulation paradigm into an ultra-competitive, physics-driven arena governed by dynamic green windows, real-time footwork momentum, and high-stakes defensive contact engine algorithms. Moving far beyond basic arcade button-mashing, dominating high-tier Park, Rec, and Pro-Am matches demands a systematic mastery of shot-meter mechanics, stamina conservation, and directional dribble cancels. Beginners who rely solely on default animations or static drive-and-kick tactics often find themselves locked up by elite lock-downs, hitting cold streaks, and dropping their Teammate Grade. Expert players, however, manipulate animation latency, build optimal MyPLAYER archetypes, and stack badge synergies to dictate the tempo of every possession.
To consistently drop green releases and lock down opponents on maximum difficulty settings, players must master a hyper-specific mechanical discipline: seamless dribble-to-shot chaining and momentum-based defensive positioning. A single miscalculated step-back vector or an un-canceled crossover animation leaves your MyPLAYER vulnerable to immediate bump-steals, contest penalties, and fast-break turnovers. This technical manual breaks down the exact controller inputs, shot-profile specs, badge loadouts, and court spacing strategies needed to transform your player into an unstoppable court general. By following the systematic phases detailed below, you will learn how to expand your green release window, break ankles on command, anchor perimeter defenses, and carry your squad across every game mode.
1. How to Calibrate Input Latency, Shot Engine Profiles, and Visual Release Cue Windows
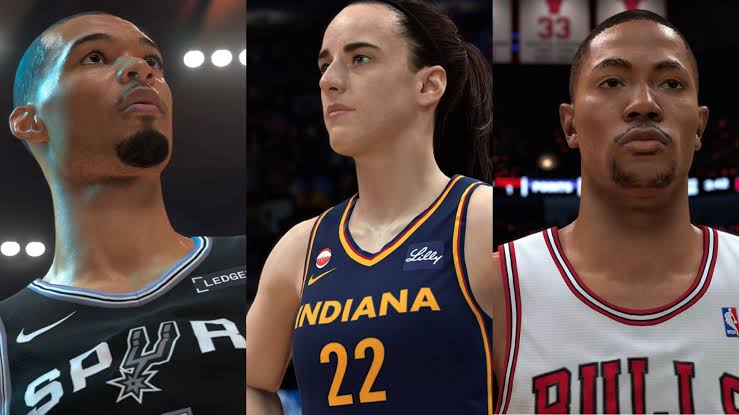
Before stepping onto the virtual courts of NBA 2K27, optimizing your controller settings and visual feedback profiles is mandatory. Visual release timing is calculated on millisecond thresholds; even a three-frame input lag can transform what looks like a perfect jumper into a heavily contested brick. Access the Controller Features menu and set your Shot Timing Visual Cue to your personal preference (Push, Release, or Jump Apex). Disabling the visual Shot Meter entirely is highly recommended for advanced play, as it expands your base Green Window by a massive 20% boost across all shooting zones.
Camera configuration is equally critical for maintaining court vision and tracking defensive rotations. Switch your camera angle from the default side-line view to "2K Camera" with a Height setting of 1 and Zoom setting of 5. This overhead perspective provides an unobstructed view of floor spacing, passing lanes, and off-ball cuts. Additionally, set your Defensive Shade Indicator to "On" to read the offensive ball-handler's hips and anticipate directional drives before their animation fully initiates.
2. How to Create Optimal MyPLAYER Archetypes and Stack Badge Synergies
The core foundation of your NBA 2K27 career is building an optimized MyPLAYER framework that hits critical attribute thresholds for high-tier animation unlocks. Simply maxing out arbitrary stats creates unoptimized builds that miss key badge tiers. To create a dominant meta build—such as a 6'6" Floor-Spacing Lock-Down or a 6'8" Point-Forward—you must allocate attributes to reach specific Gold and Hall of Fame (HoF) badge requirements, such as an 89 Three-Point Rating for Agent 3 or an 86 Ball Handle for high-level dribble packages.
Understanding badge stacking logic is vital for maximizing your court impact. Badges operate on dynamic tier categories that activate concurrently during specific play sequences. For example, executing a step-back three-pointer over a closing defender can simultaneously trigger Agent 3, Deadeye, Space Creator, and Limitless Range. Stacking these complimentary badges creates an exponential boost to your shot success probability, making contested green releases far more consistent.
3. How to Execute Advanced Dribble Cancels and Ankle-Breaking Momentum Chains
Standard directional movement in NBA 2K27 will not create separation against skilled defenders. Breaking down elite lock-downs requires executing advanced "Dribble Cancels"—interrupting a dribble animation mid-frame to snap into a sudden acceleration vector in the opposite direction. The foundation of high-level ball handling is the "Speed-Boost Crossover," performed by flicking the Right Stick diagonally up toward the off-ball hand while holding Sprint (R2/RT) and launching forward the instant the ball touches the hardwood.
To break ankles consistently, combine the Speed-Boost Crossover with the "L2/LT Cancel." As your ball-handler initiates a wide crossover animation, tap the L2/LT button for a single frame. This immediately cuts off the tail-end recovery frames of the move, allowing you to instantly snap into a Behind-the-Back escape or a Step-Back jumper while the defender's momentum is still sliding in the original direction.
4. How to Master Green Window Mechanics and Custom Jump-Shot Construction
Shooting in NBA 2K27 is strictly green-or-miss on competitive difficulty settings. A "Green Release" indicates that your input fell perfectly within your jump shot's active green timing window. However, this window is dynamic: it shifts, expands, or shrinks in real time based on your stamina level, defense proximity, shot location, and active badge triggers. Shot selection is paramount—taking a jumper with low stamina shrinks your green window by up to 50%.
Building a custom jump shot in the Jump Shot Creator requires balancing four core rating metrics: Release Height, Release Speed, Defensive Immunity, and Timing Stability. Always prioritize Timing Stability (Grade A or higher) and Defensive Immunity when crafting a jumper. A high Timing Stability grade ensures that your shot timing remains consistent even when shooting off the dribble or under low stamina conditions.
5. How to Anchor Perimeter Defense: Clamps, Fast-Feet, and Contest Vector Management
Defending in NBA 2K27 requires strict discipline to avoid getting baited into fouls or ankle-breaker stumbles. High-level perimeter defense relies on the "Riding the Hip" technique rather than spamming the steal button. Hold the L2/LT Defensive Stance trigger while using the Left Stick to shade the ball-handler toward the baseline or secondary help-defenders. When the ball-handler attempts a speed-boost drive, press L2/LT and R2/RT simultaneously while pushing your Left Stick directly into their torso to trigger a Clamps wall-up animation.
Shot contesting relies on vector alignment rather than jumping recklessly. Never press the Block button (Y/Triangle) against perimeter shooters unless you are closing out from a extreme distance, as jumping leaves you vulnerable to pump-fakes and foul calls. Instead, flick the Right Stick UP toward the shooter ("Hands-Up Defense"). This applies a heavy contest percentage without leaving your feet, allowing you to secure the defensive rebound immediately.
6. How to Master the Pick-and-Roll Engine: Reading Switches, Drops, and Blitzes
The Pick-and-Roll (PnR) remains the most lethal two-man offensive weapon in NBA 2K27. Executing an elite PnR sequence requires the ball-handler to read the opponent's defensive coverage within a fraction of a second. Call for a screen by holding L1/LB, and wait until the screener firmly sets their feet before making your move. Drive tight past the screener's shoulder to force the perimeter defender over the top or under the screen.
Reading the secondary defender determines your next action. If the defender plays "Drop Coverage" (sagging back into the paint), stop on a dime behind the screen and pop an open three-pointer. If the defense "Blitzes" or double-teams the ball-handler, immediately hit the rolling big man with a bounce pass (Circle/B) or lob a high-flying Alley-Oop (Double-tap Triangle/Y) before the corner defender can rotate over to help.
7. How to Execute Finishing at the Rim: Meter Dunks, Acrobat Layups, and Float Game
Driving into a crowded paint area in NBA 2K27 without a plan will result in getting blocked by rim-protecting bigs. To finish reliably around the basket, you must master the "Dunk Meter." Initiate a Precision Dunk by driving toward the rim with R2/RT held, then flicking the Right Stick UP and then rapidly DOWN. A dynamic meter will appear; timing your stick release inside the green zone triggers an unblockable posterizing dunk animation.
When facing elite shot-blockers sitting directly under the rim, switch your finishing package to touch layups and floaters. Executing a Floater (pulling the Right Stick straight down while driving without holding R2/RT) lofts the ball over the outstretched arms of paint protectors. Alternatively, triggering an Acrobat Layup (double-tapping X/Square mid-air) changes your shot angle in mid-flight to avoid incoming block vectors.
8. How to Master Off-Ball Movement: Dexing, Backdoor Cuts, and Screen Navigation
Standing static in the corner destroys offensive floor spacing. Advanced offensive execution relies heavily on off-ball movement techniques like "Dexing" (Deceleration/Directional Explosions). To execute a Dex cut, run hard toward one direction for two steps, quickly tap L2/LT to plant your feet, and immediately sprint in the opposite direction. This sharp cut exploits defensive camera lag, opening wide 3-point gaps along the perimeter.
When defenders play overly aggressive denial defense on the perimeter, punish them with precise Backdoor Cuts. Hold R1/RB and press the receiver's icon, then use the Right Stick to point toward the basket to trigger an immediate automated cut. Combine this with the Cut Finder and Slippery Off-Ball badges to glide past physical body-checks and finish easy transition layups.
9. How to Manage Stamina, Gatorade Turbo Bars, and Adrenaline Boosts
NBA 2K27 strictly punishes players who exhaust their stamina reserves. Each MyPLAYER possesses a primary Stamina Meter, three offensive Adrenaline Boost pegs, and a secondary Gatorade Turbo Bar. Every explosive dribble move or sprint acceleration consumes one Adrenaline Boost peg. Once all three pegs are depleted within a single possession, your movement speed drops by 30%, and your shot timing green window shrinks drastically.
To maintain peak performance across all four quarters, avoid holding the Sprint button continuously on offense. Save your sprint acceleration strictly for speed-boost launches and defensive recovery runs. Complete your weekly Gatorade Gym workouts to unlock additional Turbo Bar capacity and prevent your attributes from degrading during late-game crunch time.
10. How to Farm REP, Level Up Season Passes, and Dominate Competitive Arenas
Unlocking elite animations, mascot suits, and extra badge points requires climbing the competitive REP ladder and completing Season Pass tracks. While playing casual games provides steady experience, optimizing your in-game actions significantly accelerates your leveling speed.
To maximize your REP and Teammate Grade per game, focus on high-yield team actions rather than pure scoring. Executing alley-oop assists, securing defensive rebounds, setting hard screens, and maintaining high defensive contest percentages reward far more REP than taking contested isolations. Competing in high-stakes venues like The REC, Pro-Am, and weekend Ante-Up events provides substantial XP multipliers, allowing you to reach Legend status faster.
Mastering NBA 2K27 is a journey of converting chaotic streetball play into precise, high-speed execution and spatial control. The game transforms virtual basketball into an intense test of reflexes, spatial awareness, and strategic build crafting. Success does not come from taking contested shots or holding down sprint blindly, but from mastering shot timing visual cues, executing dribble cancels, locking down perimeter hips, and maintaining composure under high-pressure possessions. Tune your controller settings, build your optimal MyPLAYER, hit your green windows, and step onto the hardwood ready to out-dribble, out-shoot, and out-play every squad on the block.